loading.. Please Wait
The Vendor submodule in the Purchase module helps you manage vendor details, add new vendors, and perform actions like view, edit, or delete vendor records. This guide explains the features and functionalities of the Vendor submodule in detail.
Features Overview
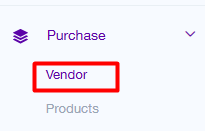
In navigation panel, click on Purchase module – Vendor.
1. Vendor Name Listing
The main screen displays a list of all vendors in a tabular format with the following columns:
Primary Name: Contact name of the vendor.
Company Name: The vendor’s organization.
Email: Email address of the vendor.
Phone: Contact number of the vendor.
Action: Options to view, edit, or delete the vendor record.
2. Add New Vendor
To add a new vendor:
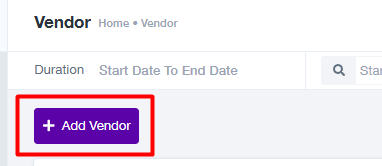
Click the + Add Vendor button.
Fill in the following fields in the form:
Primary Contact Name: Name of the vendor’s primary contact (required).
Company Name: Name of the vendor’s company.
Email: Vendor’s email address.
Phone: Vendor’s contact number.
Official Website: (Optional) Vendor’s website link.
Opening Balance: Initial balance for the vendor (if applicable).
Currency: Default currency for transactions with the vendor.
Billing Address: Vendor’s billing address.
Shipping Address: Vendor’s shipping address.
Click Save to add the vendor, or select Save & Add More to add additional vendors.
3. Filter and Search
Use the search bar to find specific vendors by their primary name, company name, email, or phone number.
Apply the Duration filter to display vendors based on a selected date range.
4. Action Items
View: Displays detailed information about the vendor, including all fields entered during vendor creation.
Edit: Allows updating the vendor’s details. Click the Edit option from the action menu, make necessary changes, and save.
Delete: Removes the vendor record from the system. Confirm the action when prompted.
How to Use the Vendor Submodule
Adding a Vendor
Navigate to the Vendor submodule under Purchase.
Click + Add Vendor.
Fill out the form with the vendor’s details and click Save.
Searching for a Vendor
Use the search bar at the top of the vendor list to type in a keyword (e.g., vendor name or email).
View the filtered results.
Using Action Items
Locate the desired vendor in the listing.
Click the Action Menu (three dots) and select:
View: To see detailed vendor information.
Edit: To update the vendor’s information.
Delete: To remove the vendor from the system.
Best Practices
Keep vendor details up-to-date by regularly reviewing and editing their records.
Use meaningful names and accurate contact details to ensure smooth communication.
Delete outdated vendor records to maintain an organized list.
FAQs
Q1: What happens if I delete a vendor?
Deleting a vendor removes their record permanently. Ensure you no longer need the vendor’s details before deleting.
Q2: Can I recover a deleted vendor?
No, once a vendor is deleted, it cannot be recovered.
Q3: How do I search for vendors added within a specific date range?
Use the Duration filter to select the start and end dates, and the list will display vendors added within that range.
Q4: Can I add multiple vendors simultaneously?
Yes, use the Save & Add More button when adding a vendor to quickly add another without exiting the form.
Need Assistance?
For further support or inquiries, contact us at support@projeni.com.