loading.. Please Wait
Orders Module Flow
In this guide, we will walk you through the steps ---
The Orders module allows you to manage all client orders efficiently, including creating new orders, viewing existing orders, exporting data, filtering and searching orders, and performing key actions. Below is a guide to navigate and use this module effectively.
Client View: Steps to Follow
Navigate to the Products Page
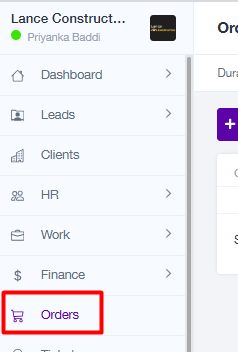
Access the Order Module from the navigation panel .
Browse and Add Products to Your Cart
Explore the available product options and add items of interest to your cart.
Review Your Cart
After shortlisting products, carefully review the items in your cart to ensure accuracy before proceeding to the next step.
Place the Order
Confirm your order list and place the order. This action will notify the admin to create a new order.
View the Bill and Make Payment
Once the order is created, you can view the detailed bill. Select your preferred payment method from the "Pay Now" option at the bottom of the bill.
Access Order and Billing Details
All details related to your bill and placed orders will be accessible under the Order Module for both clients and admins.
Admin View :
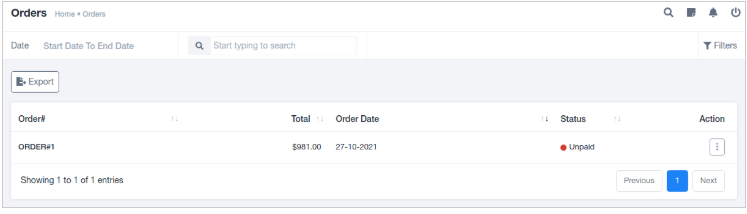
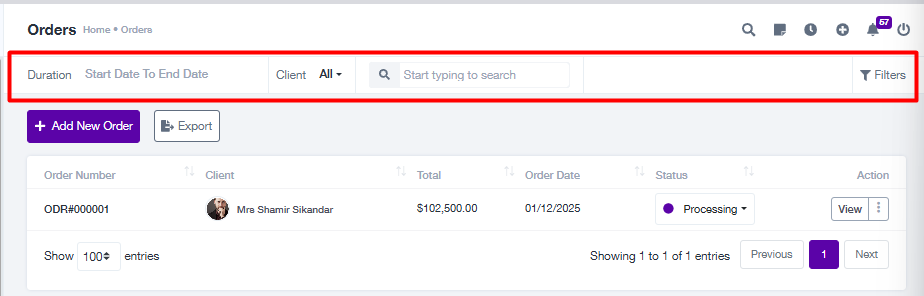
Order Listing Page
View all orders in a table format.
Columns include:
Order Number: Unique identifier for the order.
Client: Name of the client associated with the order.
Total: Total amount of the order.
Order Date: Date the order was placed.
Status: Current status of the order (e.g., Pending, Completed).
Actions: Options to view or edit the order.
Actions
View Order: Click the view icon to see detailed information about the order.
Edit Order: Click the edit icon to modify the order details.
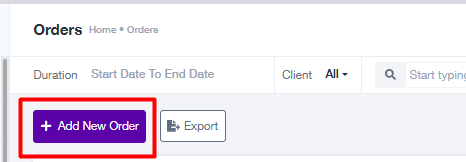
Add New Order
Click on the + Add New Order button.
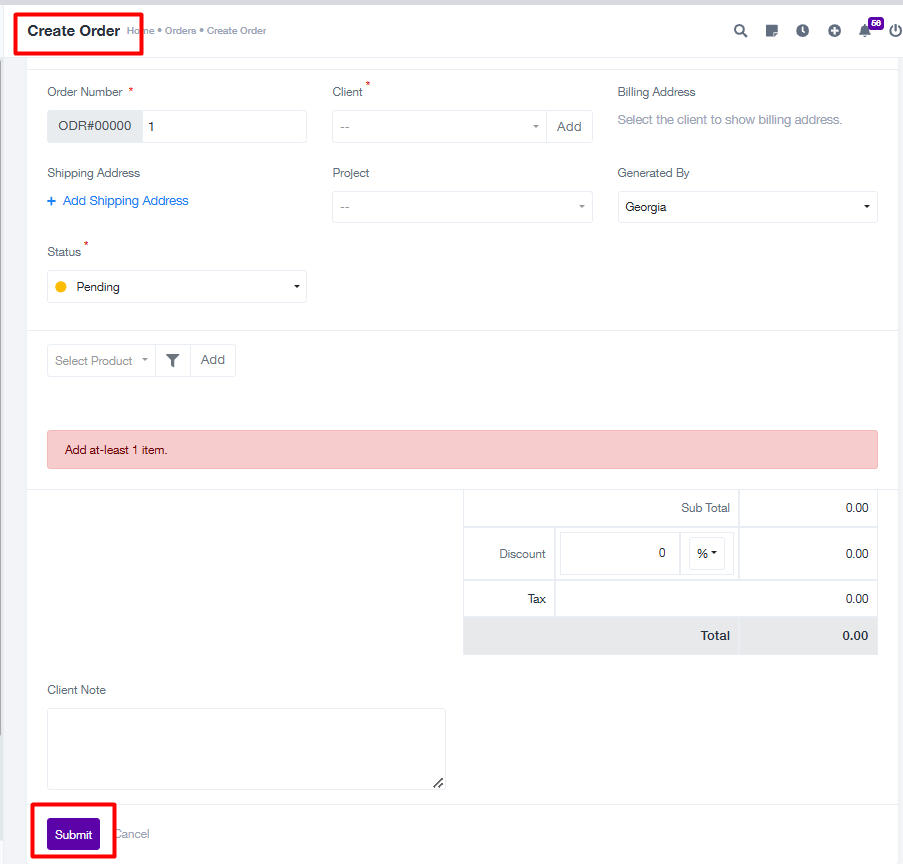
Fill in the required details:
Order Number: System-generated or manually entered unique identifier.
Client: Select the client from the dropdown.
Billing Address: Automatically populated based on the client.
Shipping Address: Add or edit the shipping address if needed.
Status: Choose the current status of the order (e.g., Pending).
Products: Select products, specify quantities, and add them to the order.
Discount: Add any applicable discounts as a percentage or flat amount.
Tax: Specify the tax percentage or amount.
Client Note: Add any additional notes for the client.
Click Submit to save the order.
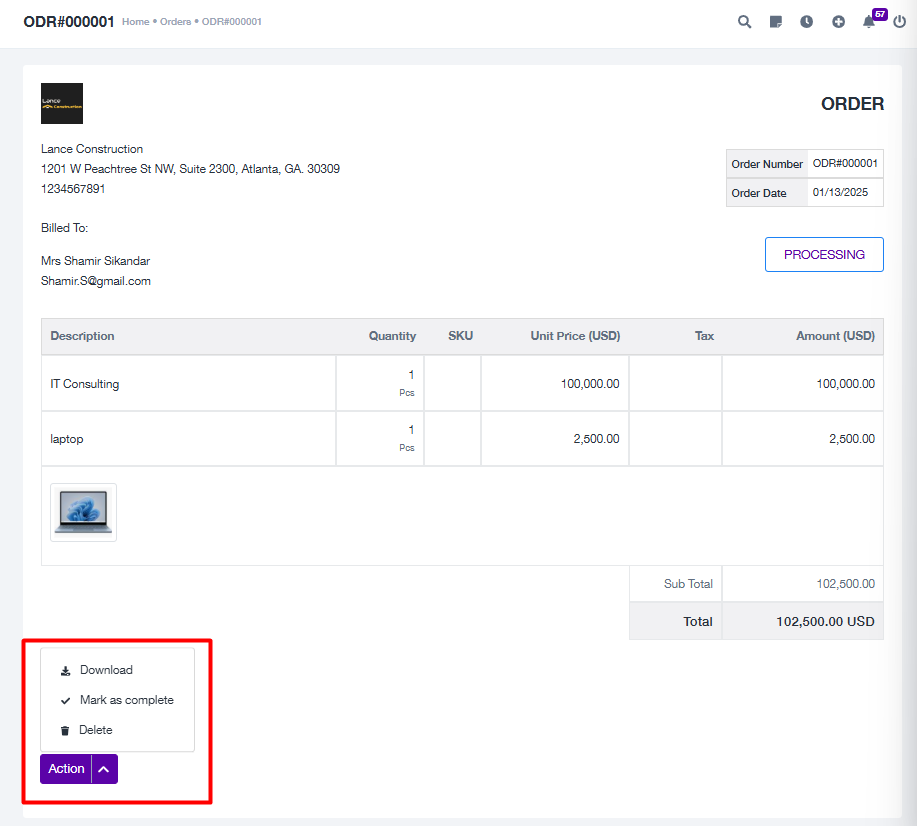
You can download the order bill by clicking on Action > Download.
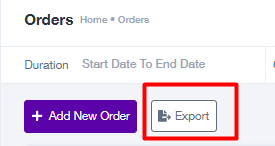
Export Orders
Use the Export button to download all order data in .xls or .csv format for analysis and reporting purposes.
Filter and Search
Apply filters to refine the order list based on:
Project: Filter by associated projects.
Status: Filter by the current order status.
Use the search bar to quickly locate specific orders by typing relevant keywords.
Best Practices
Regularly update the status of orders to reflect their current stage.
Use clear and concise client notes for better communication.
Export order data periodically to maintain records and track performance.
Need Assistance?
For further help or questions about the Orders module, please contact our support team at support@projeni.com. We are here to assist you!