loading.. Please Wait
In this guide, we will walk you through the steps for onboarding customers to the SaaS platform. It provides step-by-step instructions for account setup, configuration, and optimization to ensure a seamless experience.
1. Sign-Up and Dashboard Access
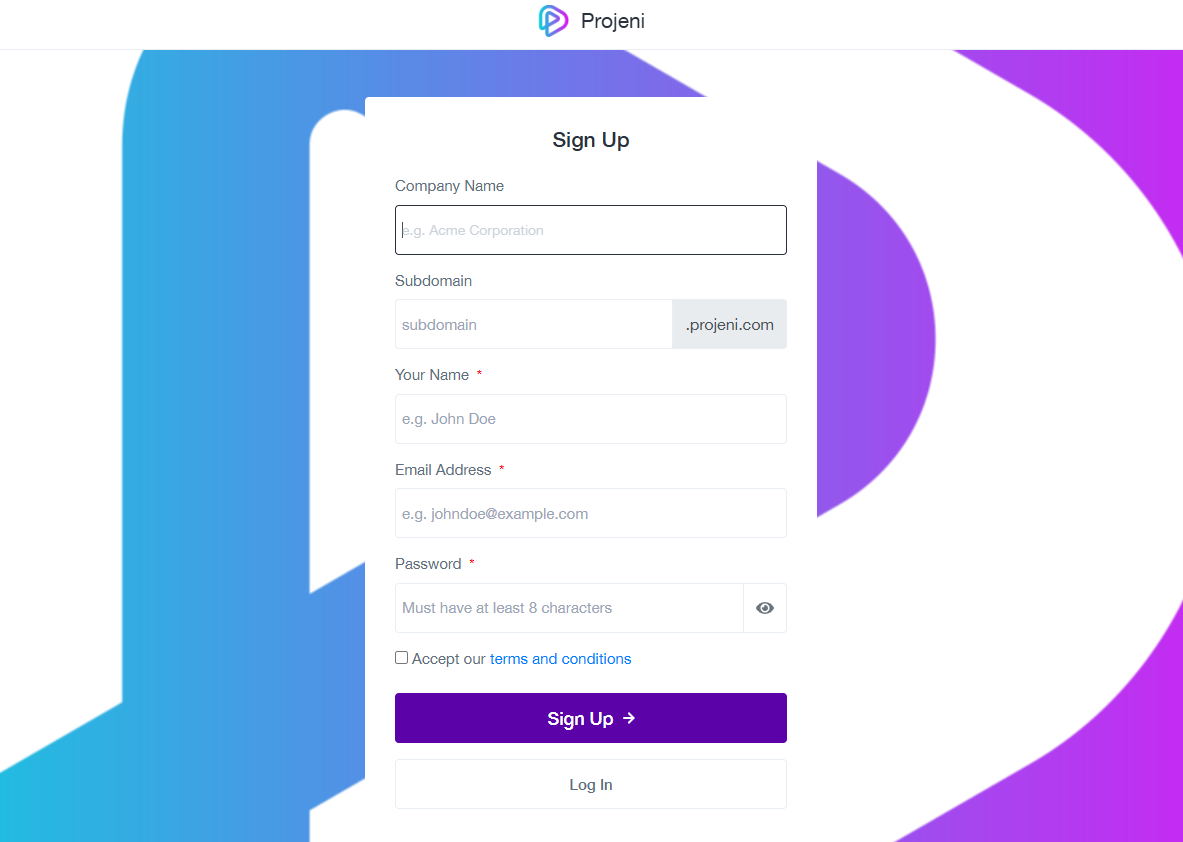
Customers begin by signing up on the platform.
After signing up, they are redirected to their Private Dashboard, which serves as the central hub for navigation.
The dashboard includes several menu options such as:
Private Dashboard
Advanced Dashboard
Leads
Clients
HR
Work
Finance
Order
Tickets
Events
Message
Notice Board
Knowledge Base
Reports
Settings
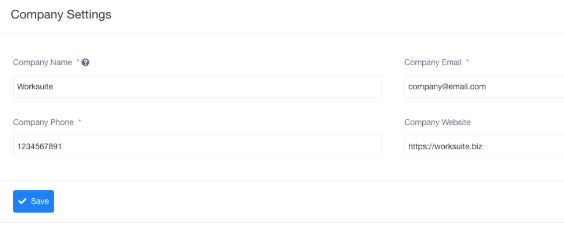
2. Company Settings
This section is essential for managing overall system settings.
Fill out company details (e.g., name, address) used in legal and operational documents such as invoices, contracts, and estimates.
3. App Settings
Default settings applied to all users within the organization.
APP Settings serve as the default configurations applied to all user systems connected through the company's database. These settings ensure uniformity across all connected devices.
CLIENT SIGN-UP SETTINGS enable clients to self-register and log in. Controlled by administrators, this feature can be activated or deactivated based on the organization's preference. It allows clients the flexibility to log in and manage their information independently.
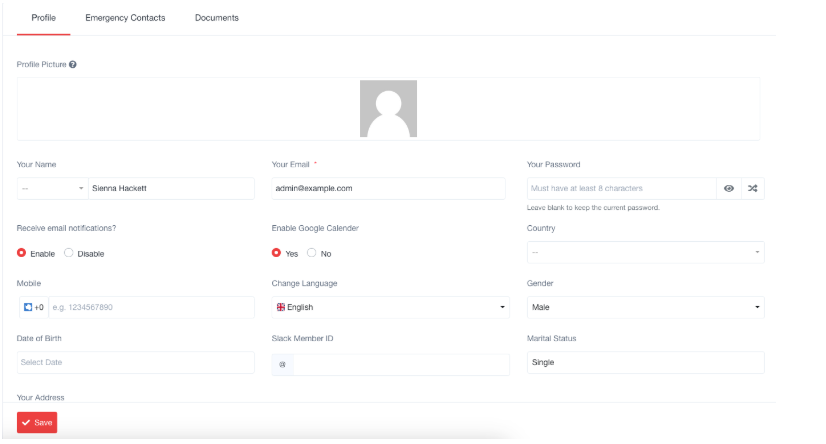
4. Profile Settings
Personalize your profile by adding general details, emergency contacts, and important documents.
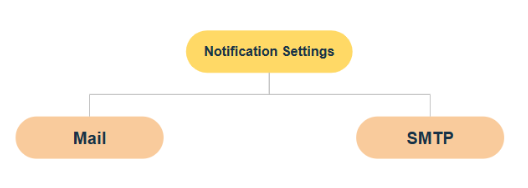
5. Notification Settings
Manage how you receive notifications for work updates:
Choose between Email or SMTP (Simple Mail Transfer Protocol).
SMTP is recommended for reliability.
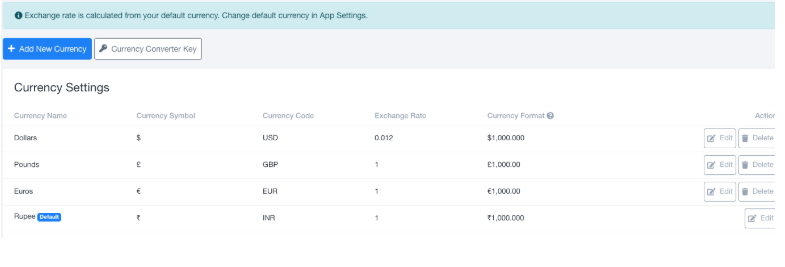
6. Currency Settings
Customize the platform for frequently used currencies.
Add and switch currencies for financial transactions as needed.
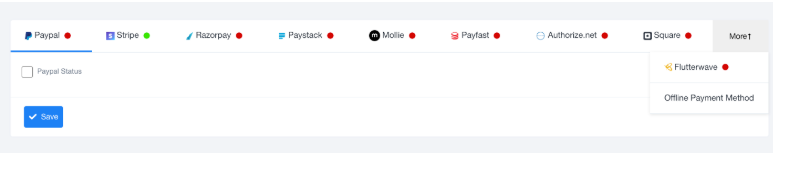
7. Payment Credentials
Specify accepted payment platforms to streamline transactions.
Customers are redirected to the payment page automatically during payment processes.
8. Finance Settings
Set default financial details such as:

Ticket Settings
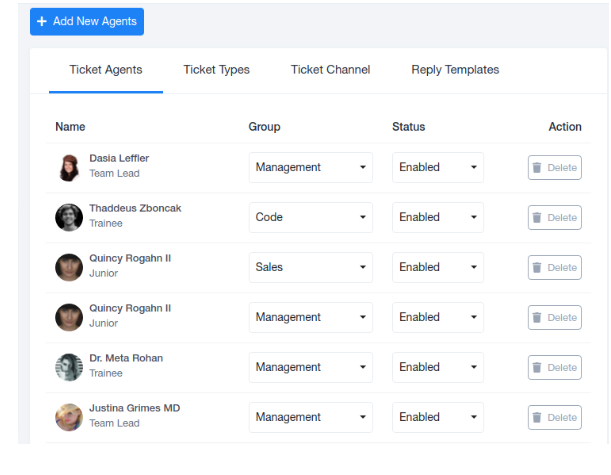
Tickets serve as a primary method for users to reach out to authorities for assistance with problems, queries, or difficulties. Ticket settings allow the configuration of various elements such as Ticket Agents, Ticket Types, Ticket Channels, Reply Templates, and Ticket Visibility.
Ticket Agents
Ticket Agents are employees assigned to handle tickets and assist users in resolving issues or discrepancies effectively.
Ticket Visibility
The Ticket Visibility feature in the CRM provides control over which tickets users can view based on predefined settings. This ensures relevant access, enhancing focus and efficiency. Users can customize visibility options as follows:
All Tickets: Access every ticket in the system.
Tickets in a Group: View tickets assigned to the user’s group.
Assigned Tickets: See only the tickets directly assigned to the user.
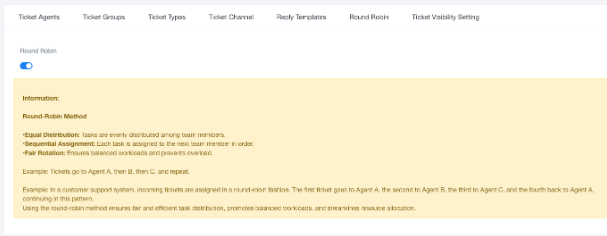
Round Robin Assignment
The Round Robin method ensures fair and balanced ticket distribution among agents. Tickets are automatically assigned in equal rotation, ensuring sequential and equitable assignment to all agents.
This setup streamlines ticket management and enhances the efficiency of handling user concerns.
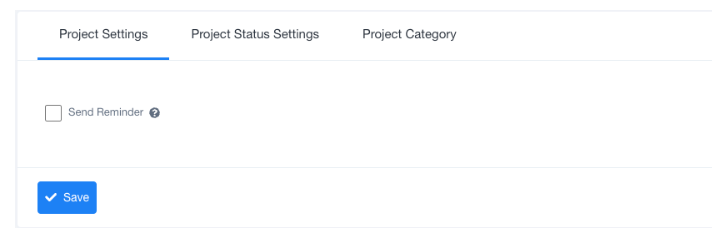
10. Project Settings
Enable and customize work reminders for projects.
Set notification recipients and timing for reminders to avoid delays.
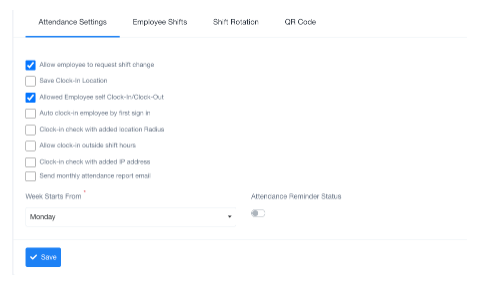
11. Attendance Settings
Define office timings, clock-in policies, and working days.
Manage late marks and clock-in/out details.
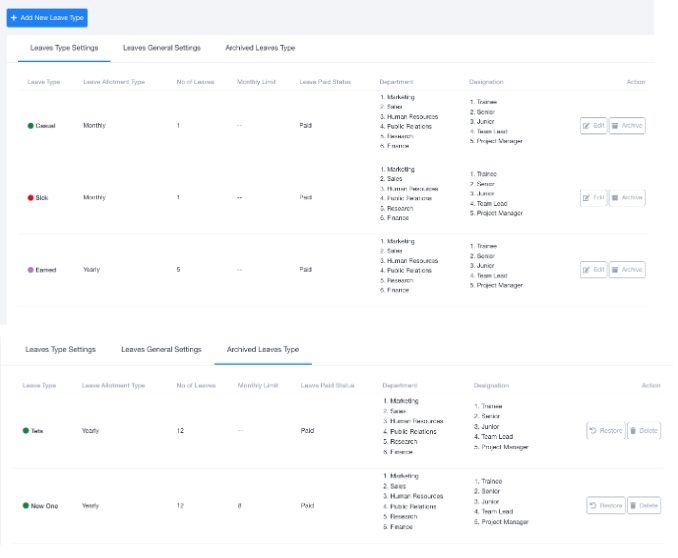
12. Leave Settings
Define leave categories (e.g., paid/unpaid).
Archive leaves for record-keeping and deletion only when necessary.
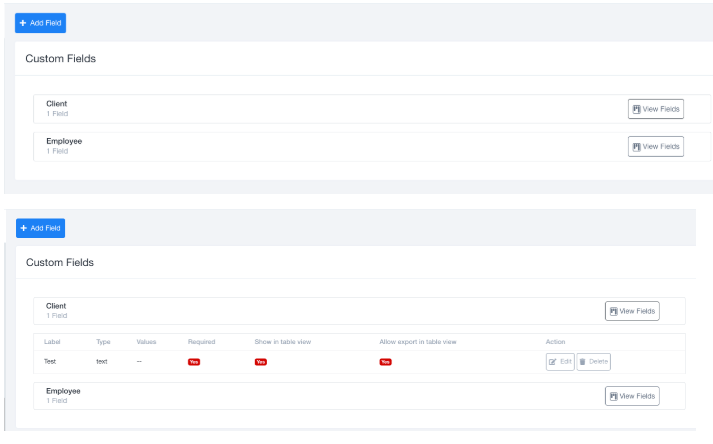
13. Custom Fields
Add extra fields to forms for collecting specific information tailored to your organizational needs.
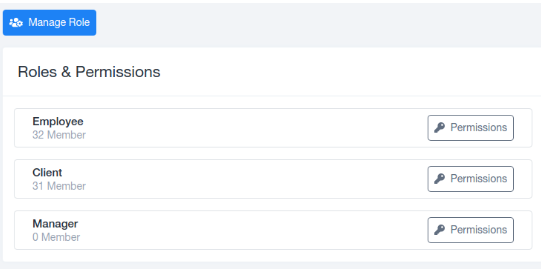
14. Roles and Permissions
Control access to various modules and features.
Assign roles and permissions to team members based on their responsibilities.
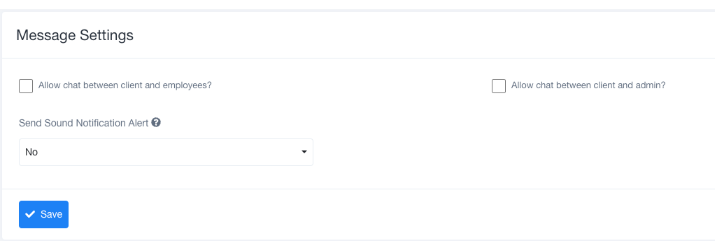
15. Message Settings
Configure messaging between clients, admins, and employees.
Enable or disable communication channels as needed.
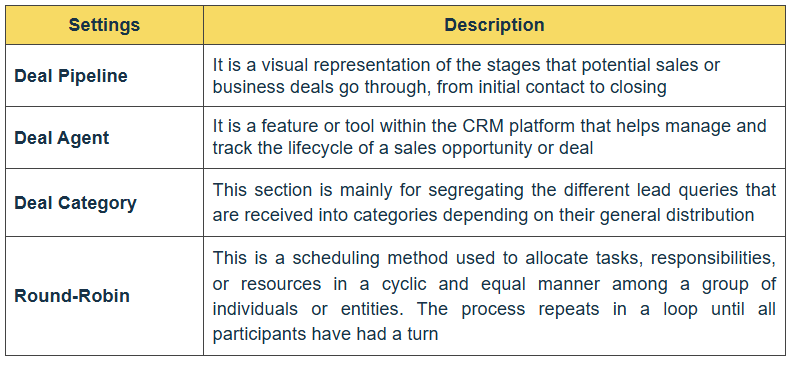
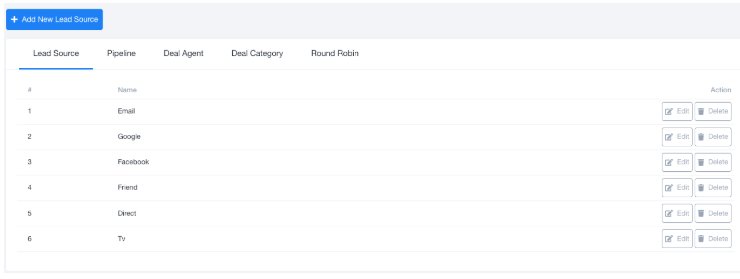
16. Lead Settings
Organize lead management by setting up:
Lead sources.
Deal pipelines for tracking stages.
Deal categories and agents.
Round Robin scheduling for fair distribution.
These individual categories under lead settings are also editable depending on the requirements. These settings are open for customization to allow the freedom of usage for the users.
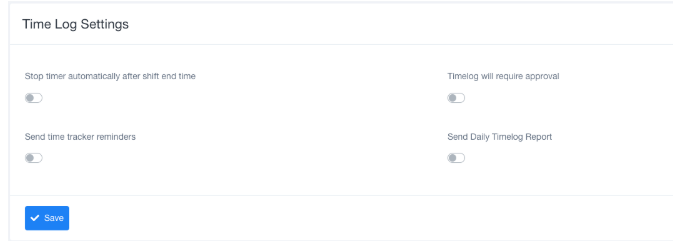
17. Time Log Settings
Track time spent on tasks and projects.
Enable timers and configure settings for after-office hours.
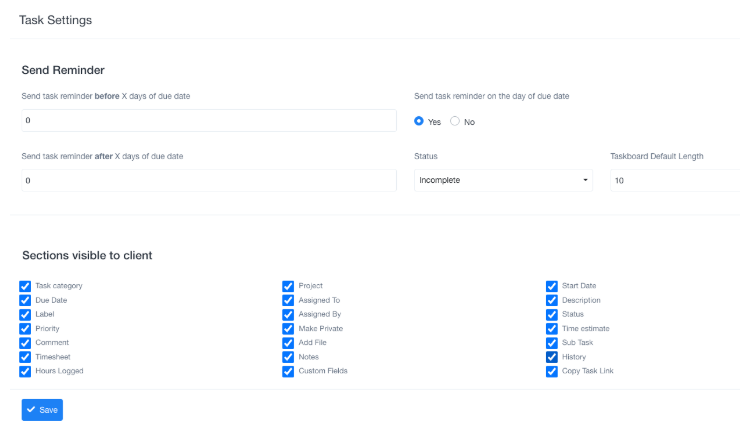
18. Task Settings
Break down projects into manageable tasks for better organization.
Use task management tools to ensure timely project completion.
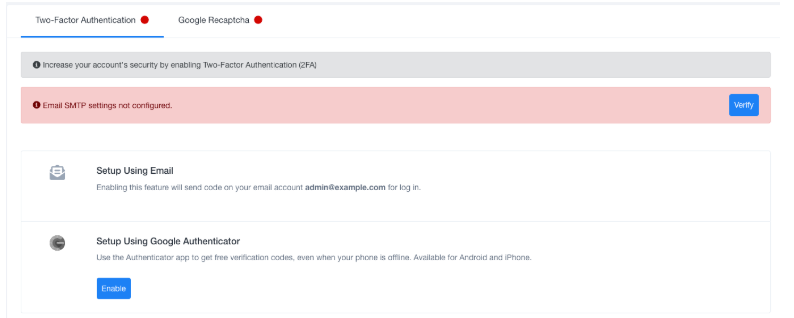
19. Security Settings
Protect user data with Google Recaptcha (V2 or V3 options).
Configure security methods to meet organizational needs.
20. Theme Settings
Customize the platform’s visual theme to align with your organization’s branding.

21. Module Settings
Add or remove modules in the dashboard for optimized workflows.
Customize modules for each team panel based on requirements.
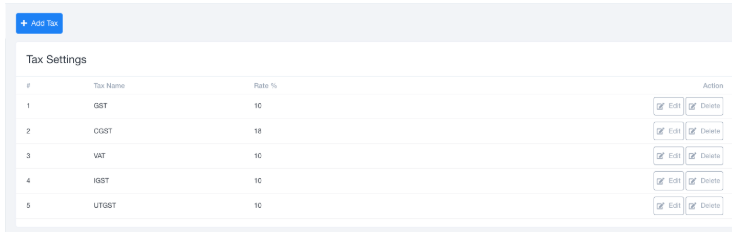
22. Tax Settings
Define tax details for use in invoices and product pricing.
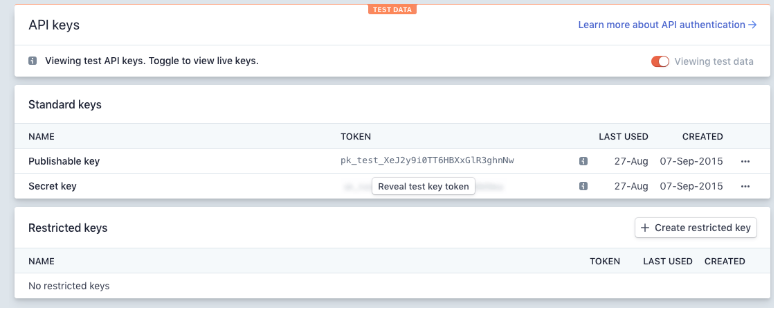
23. Stripe Payment Credential Setup Example
To set up Stripe Payment, follow these steps:
Log in to your Stripe account.
Click on "Developers" in the menu.
Navigate to "API Keys" and retrieve the secret and publishable keys.
Use live keys for production or test keys for sandbox environments.