loading.. Please Wait
The Bills submodule in the Purchase module allows users to manage purchase bills efficiently. Users can view existing bills, create new ones, and perform actions such as editing, sending, and downloading bills. This guide provides an overview of the features and functionalities of the Bills submodule.
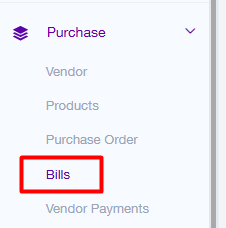
In the navigation panel, click on Bills
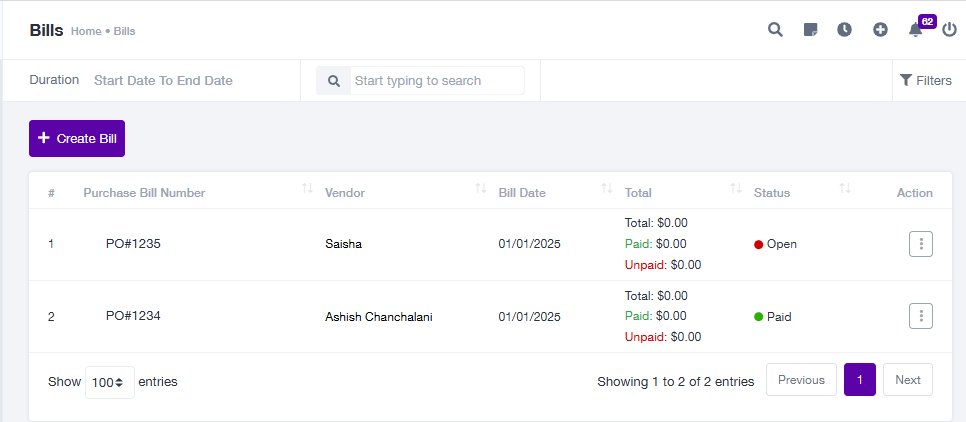
1. Purchase Bill Listing
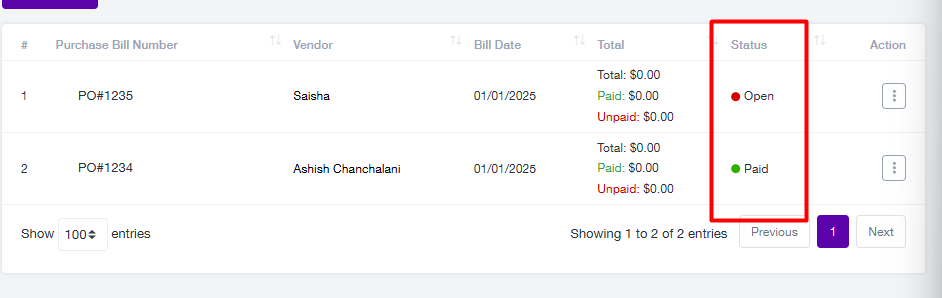
The main screen displays a list of all purchase bills in a tabular format with the following columns:
Purchase Bill Number: Unique identifier for each bill.
Vendor: Name of the vendor associated with the bill.
Bill Date: Date the bill was created.
Total: The total amount of the bill, including paid and unpaid amounts.
Paid: The amount already paid.
Unpaid: The amount pending payment.
Status: Current status of the bill (e.g., Open, Draft).
Action: Options to view, edit, send, or add payments to the bill.
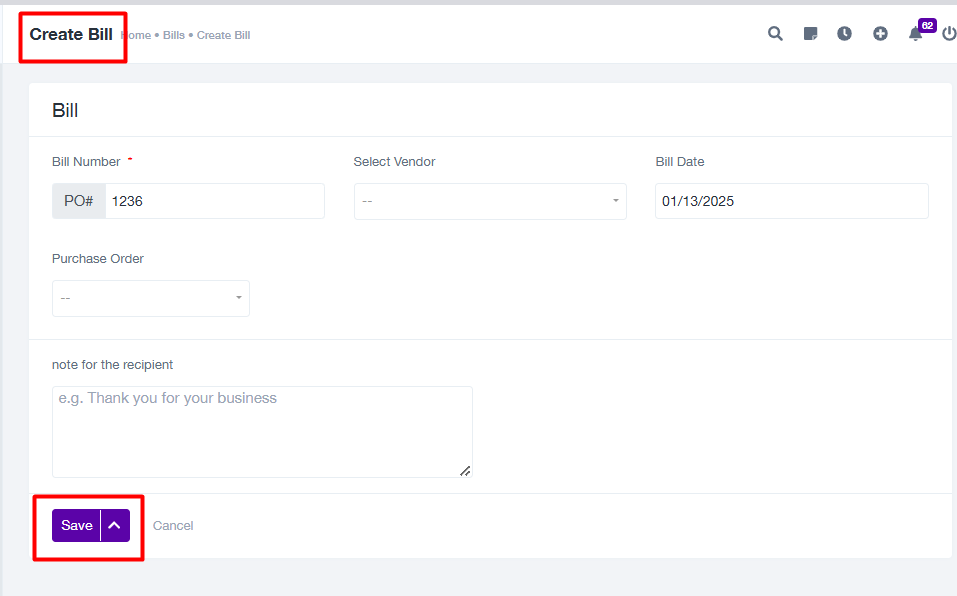
2. Create Bill
To create a new purchase bill:
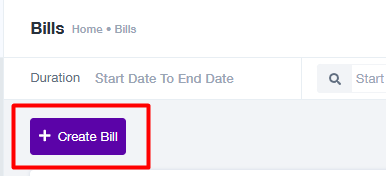
Click the + Create Bill button.
Fill in the following fields in the form:
Bill Number: Automatically generated or entered manually (required).
Select Vendor: Choose the vendor for the bill (required).
Bill Date: Specify the date of the bill (required).
Purchase Order: Link the bill to an existing purchase order (if applicable).
Notes for the Recipient: Add notes for the vendor, if needed.
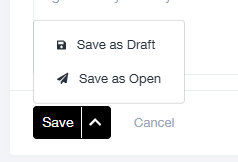
Click Save and choose:
Save as Draft: Save the bill as a draft for further editing.
Save as Open: Save the bill in open status, making it ready for further actions.
3. Filter and Search
Use the search bar to find specific bills by keywords such as bill number or vendor name.
Apply filters to narrow down bills based on:
Duration: Filter by start and end dates.
Status: Show only bills with a specific status (e.g., Open or Draft).
4. Status Management
Bills can have two statuses:
Open: Bill is active and ready for further processing.
Draft: Bill is saved as a draft and can be edited before being finalized.
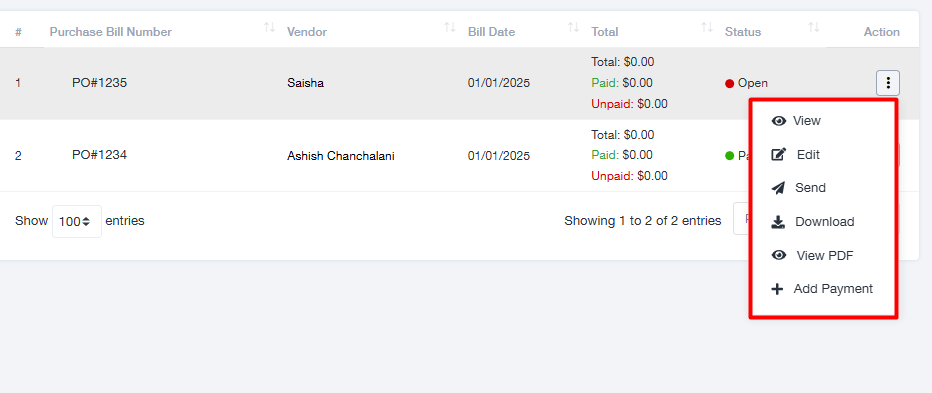
5. Action Items
View: Displays detailed information about the bill, including linked purchase orders and payment details.
Edit: Allows updating the bill details. Click the Edit option from the action menu, make changes, and save.
Send: Marks the bill as sent to the vendor.
Download: Downloads the bill details as a file.
View PDF: Generates a PDF version of the bill for sharing or printing.
Add Payment: Records a payment made towards the bill.
How to Use the Bills Submodule
Creating a Bill
Navigate to the Bills submodule under Purchase.
Click + Create Bill.
Fill out the form with the bill details and click Save.
Searching for a Bill
Use the search bar at the top of the bill list to type in a keyword (e.g., bill number or vendor name).
View the filtered results.
Managing Bill Status
Locate the desired bill in the listing.
Check the Status column to see whether the bill is open or in draft.
Update the status as needed during editing.
Using Action Items
Locate the desired bill in the listing.
Click the Action Menu (three dots) and select:
View: To see detailed bill information.
Edit: To update the bill.
Send: To mark the bill as sent to the vendor.
Download: To save the bill details as a file.
View PDF: To generate a PDF of the bill.
Add Payment: To record a payment made towards the bill.
Best Practices
Regularly update bill statuses to ensure accurate financial records.
Save bills as drafts if details are incomplete to avoid errors in finalized bills.
Use detailed notes and payment tracking to maintain transparency with vendors.
FAQs
Q1: What happens if I save a bill as a draft?
The bill remains in draft status and can be edited before being finalized.
Q2: Can I recover a deleted bill?
No, once a bill is deleted, it cannot be recovered.
Q3: How do I add a payment to a bill?
Use the Add Payment option in the action menu of the desired bill.
Q4: Can I generate a PDF for a bill?
Yes, use the View PDF option in the action menu to generate a PDF version of the bill.
Need Assistance?
For further support or inquiries, contact us at support@projeni.com.